Permission groups can used to group permissions and assign it to a set of users.
An authorization group can have multiple permissions and a user can have multiple authorisations.
Example:
You want the CEO to possess the permission to view reports and export case files/inspections. You can grant this permission by creating a new authorization group from the 'Organisation Settings' functionality.
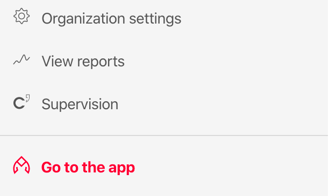
- From your homepage go to 'Organisation settings'.
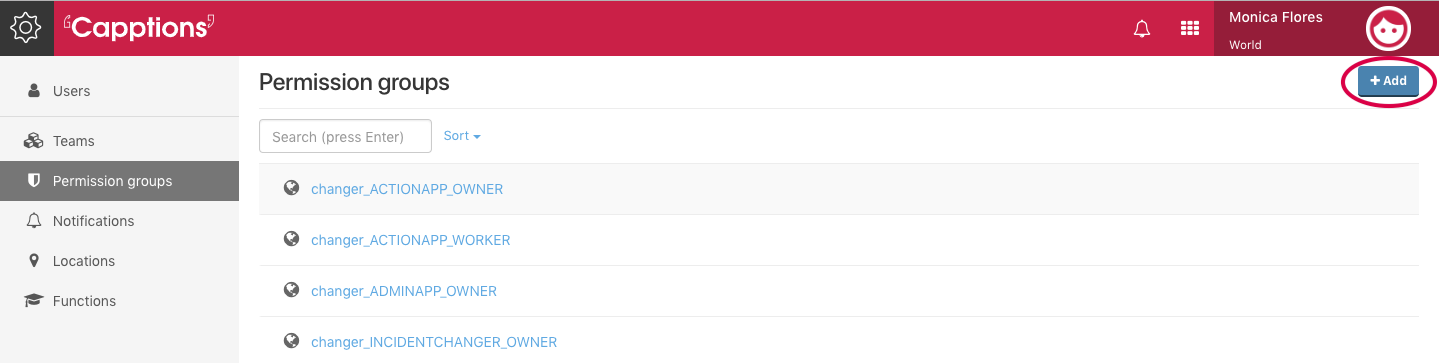
- Click on 'Permission Groups', and then 'Add'.
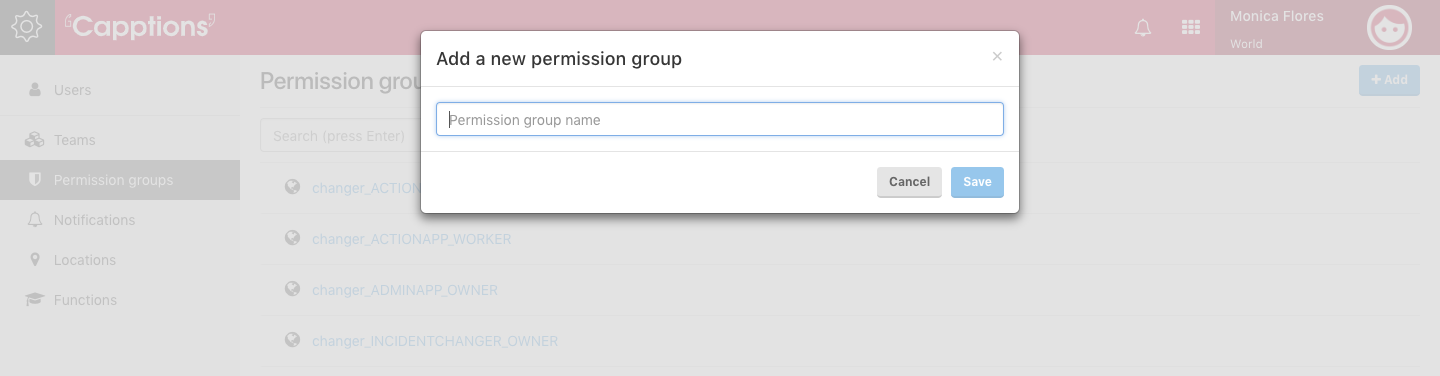
3. Give it a relevant name and hit 'Save'.
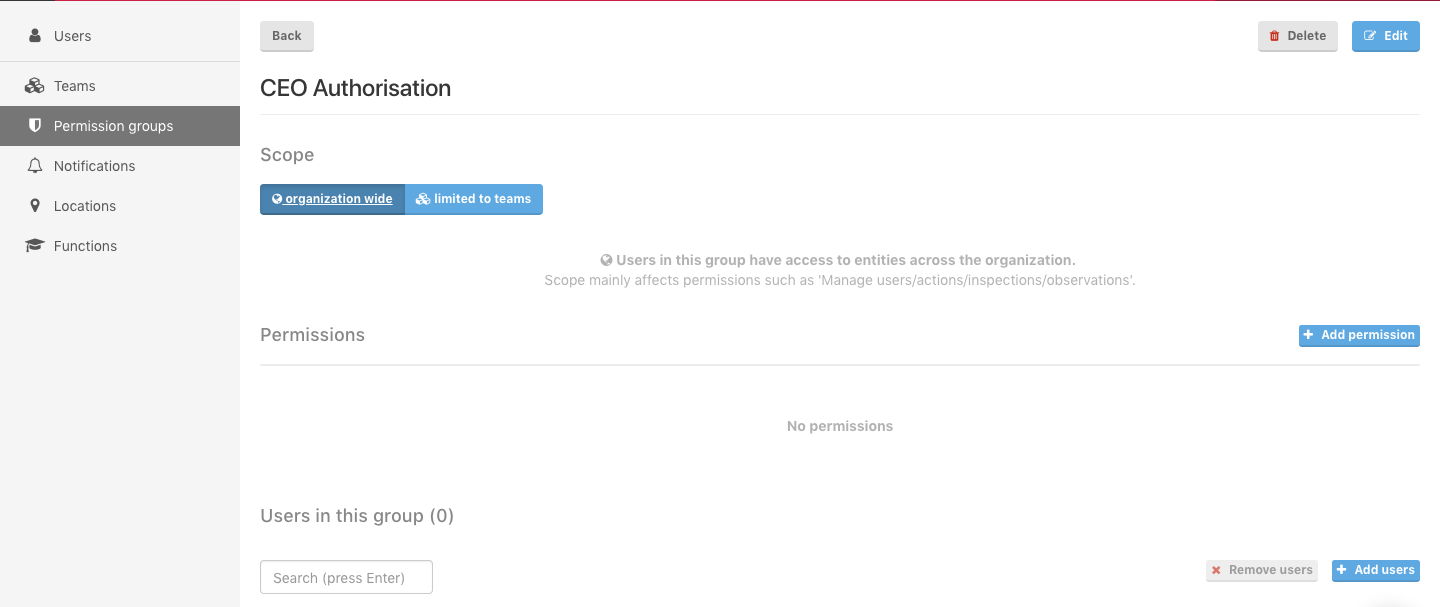
4. Now add the relevant permissions to this group by clicking on 'Add permission'.
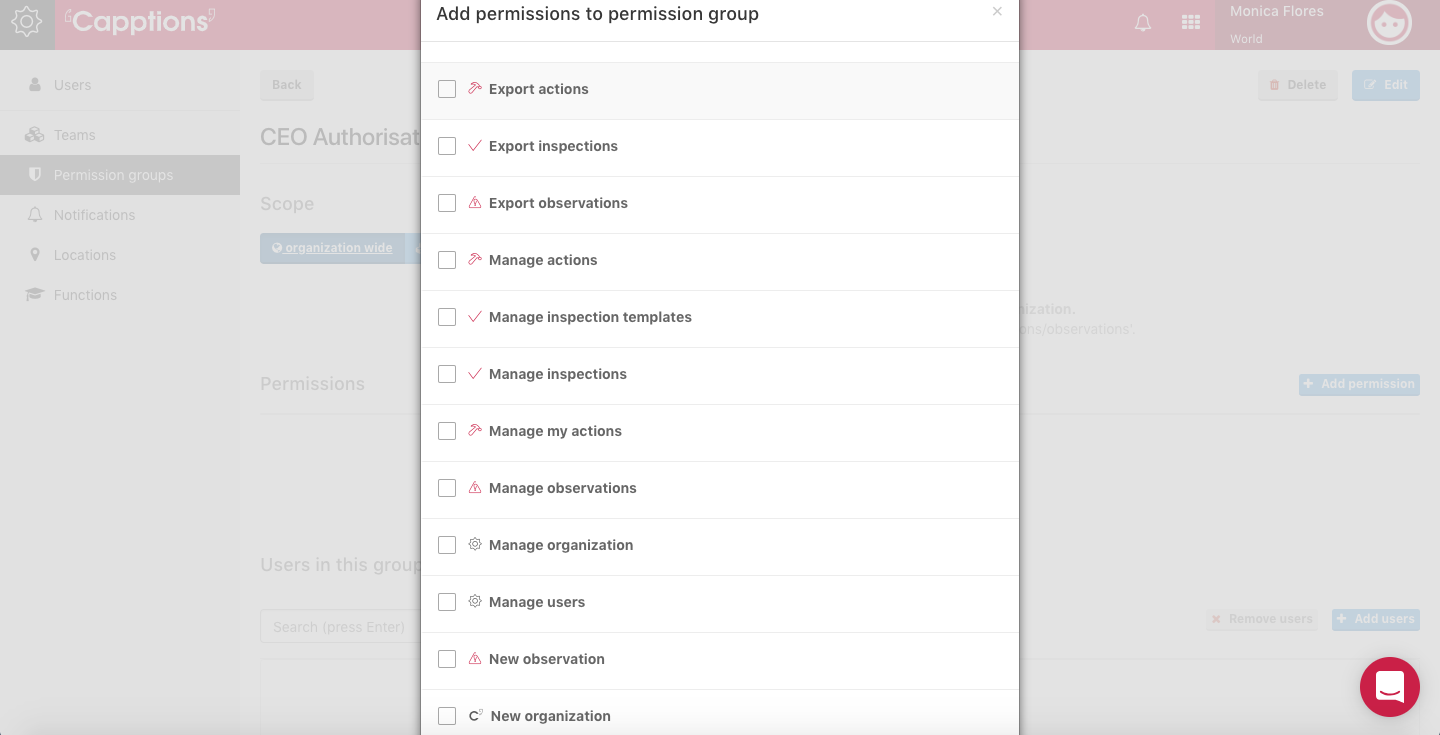
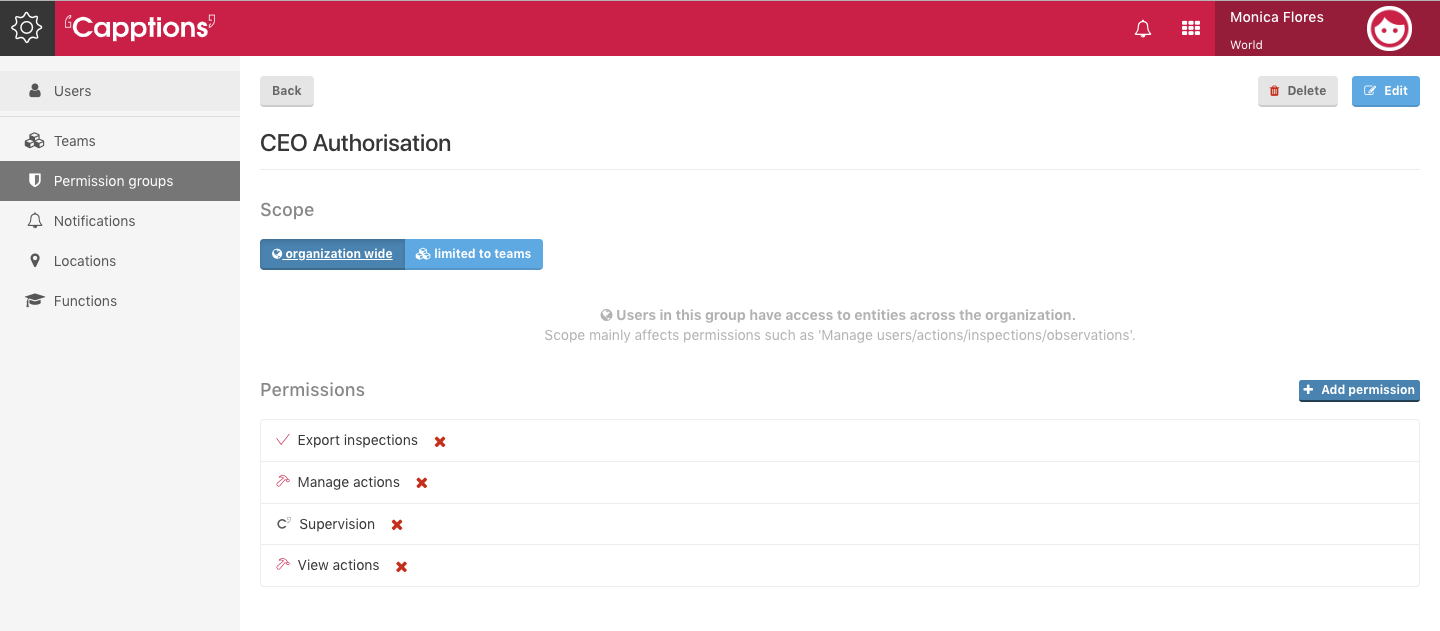
4. You can see the Authorisation group with its permissions
5. Add your CEO to the permission group.
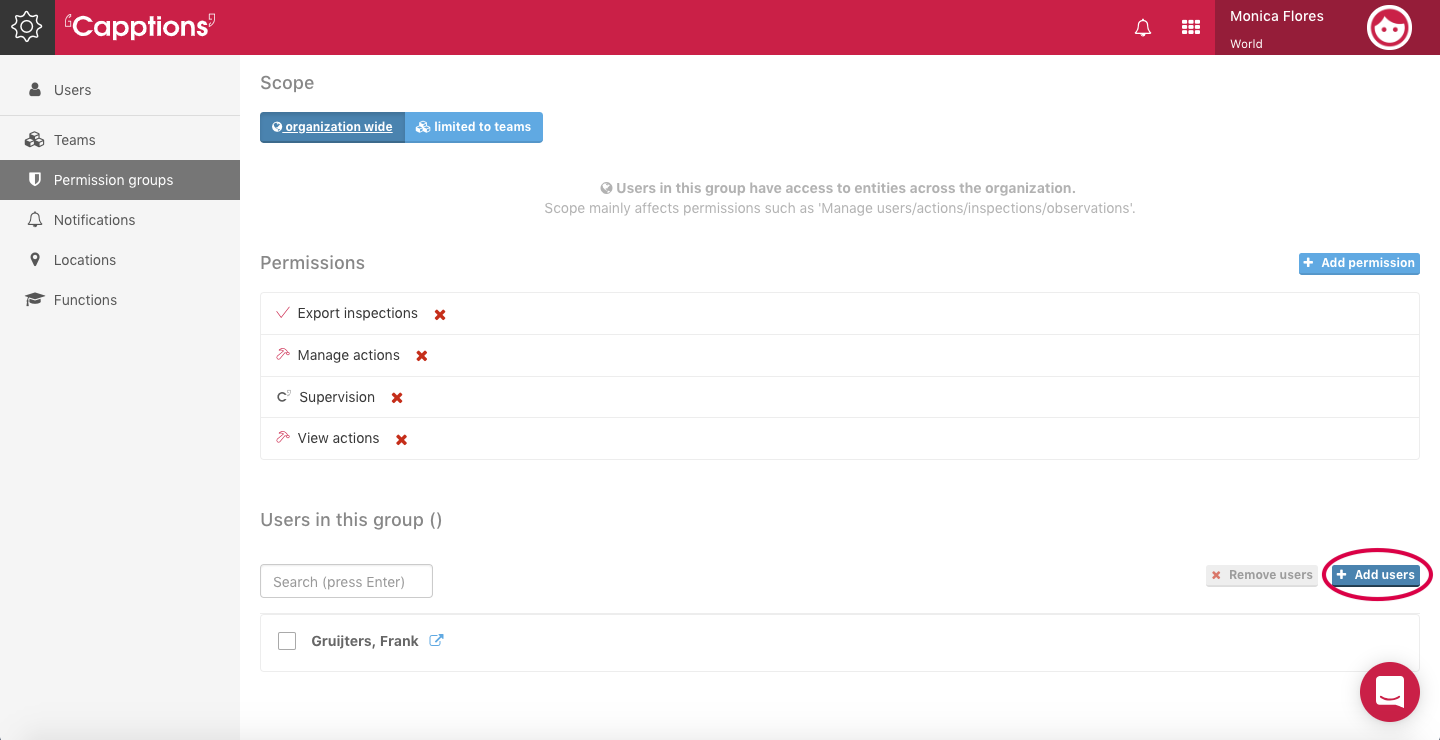
6. Now assign the relevant users by clicking on 'Add users', and choose users from your organisation.